Elastic webbing (by the running foot)
$ 1.50
-
To learn how to measure how much you need, see the How To Measure tab above.
******************
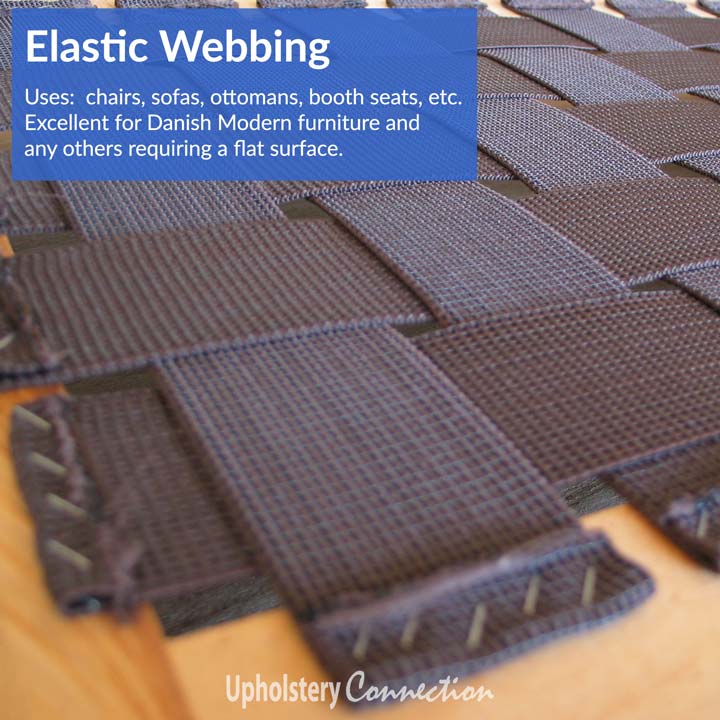
Stretchy strong webbing for flat seating - Danish modern chairs, dining chairs, ottomans, automotive seats, etc.
This is a great alternative for rubber webbing, but is not recommend for Henry Link furniture. It's really easy to install (get this tool and make your life easier) and should result in a nice, taut surface with enough give to provide a comfortable, flat-surfaced seat that won't sag. Be sure to install it so it's really tight.
• Width = two inches / 2"; if your old webbing is 1-1/2" to 1-3/4" wide, it's likely shrunk down from two inches
• Made by Matrix, the industry leader in elastic webbing
• Made of the highest quality, rubberized filaments
• Click the "How to Measure" tab above for details on how to measure what you need
• Price is by the running foot: input desired quantity before clicking "add to cart"
• Quantity is shipped in one continuous length (i.e. if "4" is in the quantity box, one piece, four feet long, will be shipped)
Important note: Item is not returnable. Purchasing this product implies adherence to this policy. Thank you for your understanding.
-
How does one know how much webbing to order? Here's how to measure what you need:
Grab a pencil, paper and a tape measure.
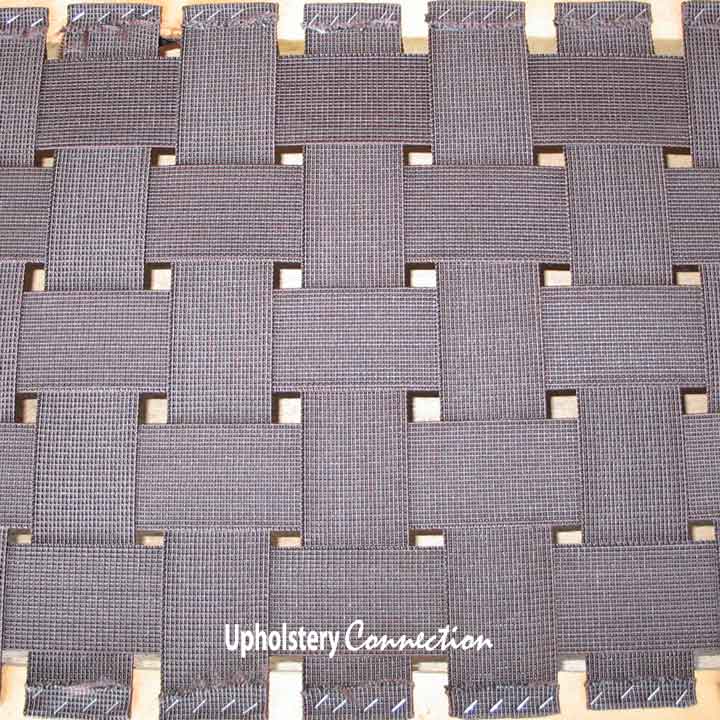
For your furniture frame, think rows (the width if the seat) and columns (length of the seat from front to back). You'll need to interweave the webbing to get a firm, solid surface / seat. Some people only span one side and not interweave. While this saves money upfront, the seat will sag much sooner and will not be comfortable. Perhaps you've already experienced this? Why skimp on materials when you're spending the time and effort to repair something that you want to last?
For this example, we're going to use a seat frame that is 20" wide (side to side), and 18" long (front to back).
Get ready for some simple math, and if you need some help, enlist a teenager, because they know everything, right? 🤣
Grab that tape measure and measure the width (side-to-side) of your seat frame. Write that number down and divide by 2. The reason why we're dividing by 2 is because the webbing is 2" wide. This measurement will determine how many columns are needed to go across. For our example, a 20" width needs 10 columns (10 ÷ 2" = 10 columns).

Now do the same, but in the other direction (side-to-side). This will determine how many "rows" you need to span side-to-side. For example, an 18" length needs 9 rows (18" ÷ 2" = 9 rows).

Let's now focus on the columns (front-to-back). This next measurement will tell us how many inches we need to cover all the columns. Remember how you wrote down 10 columns? Now multiply that number by the height of your frame, which for our example, is 18". Here's what that looks like: 10 columns x 18" length = 180 inches)
We're going to do the same thing for the rows (side-to-side). This measurement will tell us how many inches we need to cover all the rows. Multiply the number of rows (9) by the width of your frame. For our example, this would be 9 rows x 20" length = 180 inches)
Now we're going to add the rows and columns together to get the (almost) total amount of inches of webbing you'll need. Continuing with this example: 180" (columns) + 180" (rows) = 360 total inches.

You're doing great! And that teenager isn't even near you.
At this point, it's important to emphasize the 25% stretch factor of this material. You will like this factoid because it means you need basically 25% less inches than what you just calculated. Translation: you're saving money!
Here's how we account for the stretch factor: Multiply the 380 (total inches) by 75% to account for the 25% stretch (100% - 25% = 75%). For our example:
360 (total inches) x .75 (25% stretch factor) = 285 inchesNow we're going to calculate how many feet of webbing to order. Divide 285 (inches) by 12" (one foot) to get the number of feet. Example:
285" ÷ 12" = 23.75 feet.
Now round this up to 24 feetAlmost there! You'll need to add a few extra feet to account for stretching/pulling, etc. Remember: you'll need to grip the webbing (ideally using a webbing stretcher) to pull and affix to frame, which means you'll need something to hold onto. Better to be safe and order a few extra feet than to order under and be short in the middle of a project.
We strongly recommend the following for projects requiring:
• less than 20 feet: add one more foot
• 20 - 50 feet: add two more feet
• 50 - 80 feet: add three more feet
Continue adding one foot for every 30 feet as such. Thus...
The total amount needed for this example: 26 running feetExtremely important note: we strongly recommend you cut each length only after you've measured the distance the strip of webbing will span. If you pre-cut all the strips at the onset, you risk wasting material if all the spanning distances are not uniform.
Congrats! You did it! Woohoo!!!
Back to the top of the page / "add to cart"
Related Items

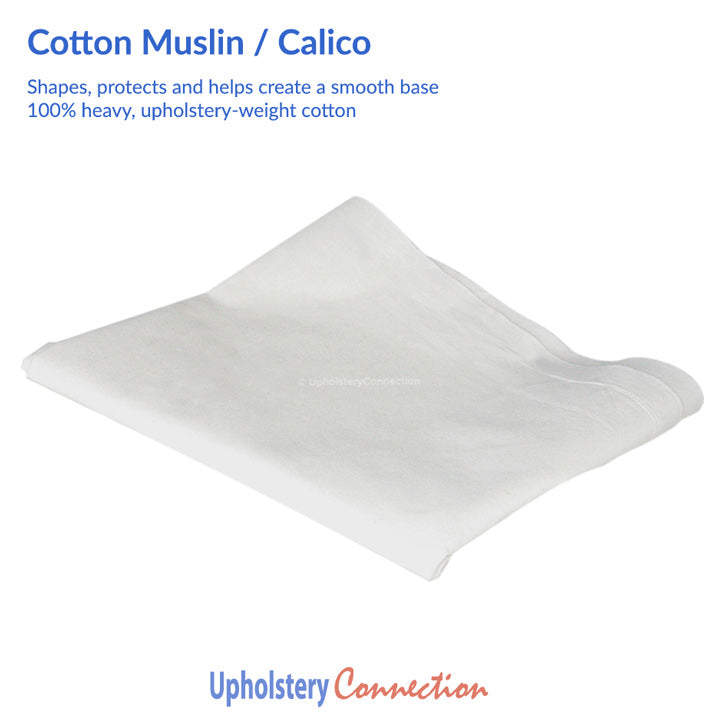
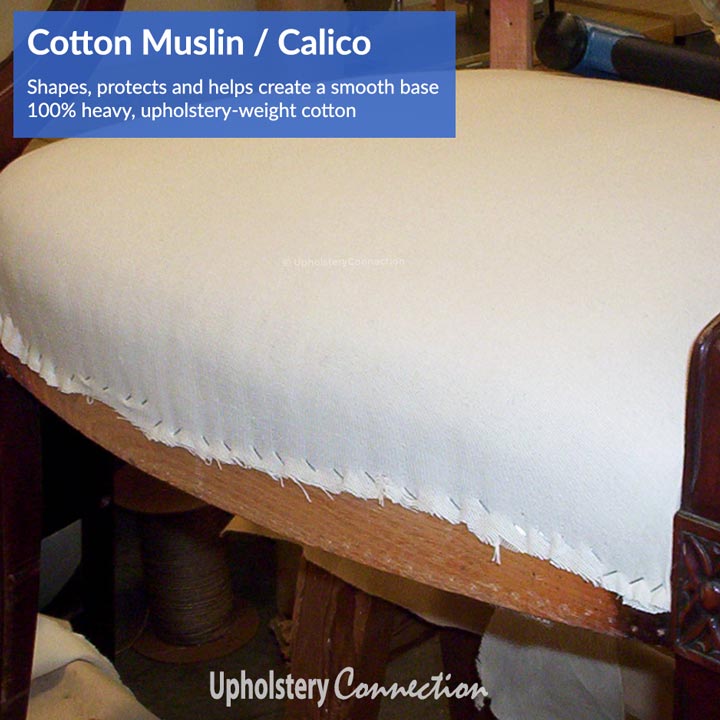
100% Cotton Muslin
$ 9.95
Our 100% unbleached cotton muslin is very high quality with a tight, even weave. It's made especially for upholstery, meaning it's heavy weight so as to withstand the pulling and...

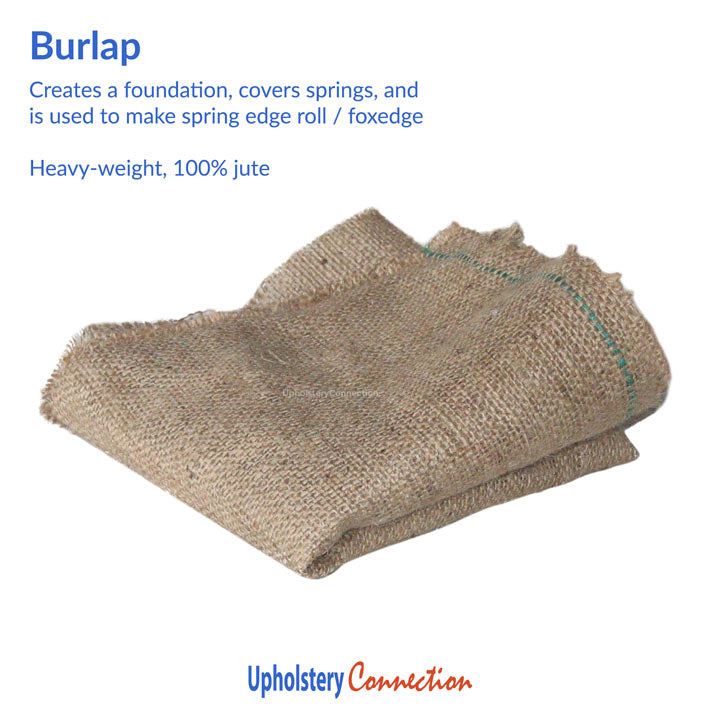
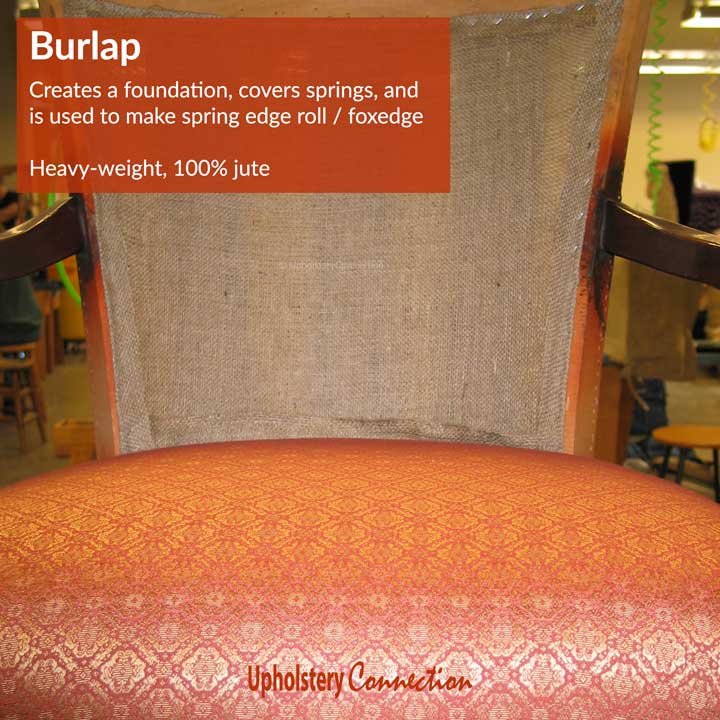
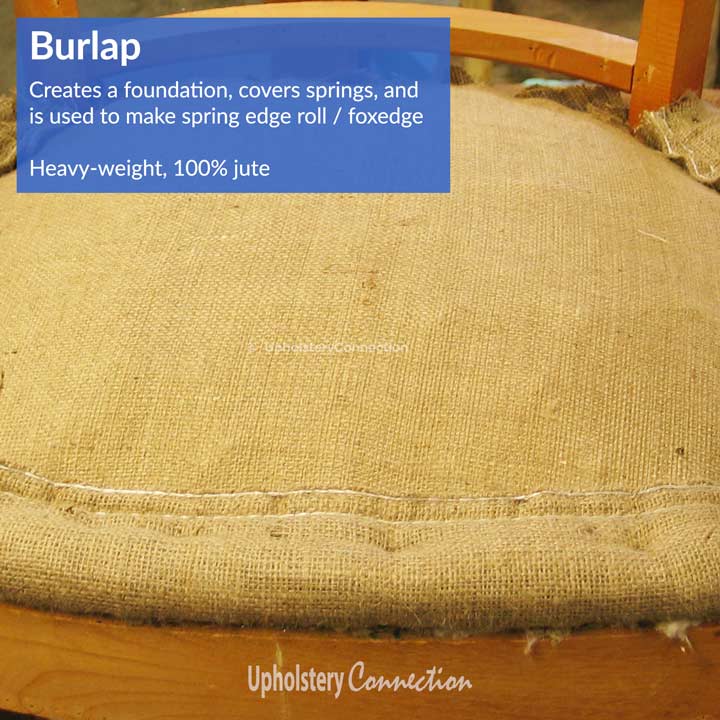
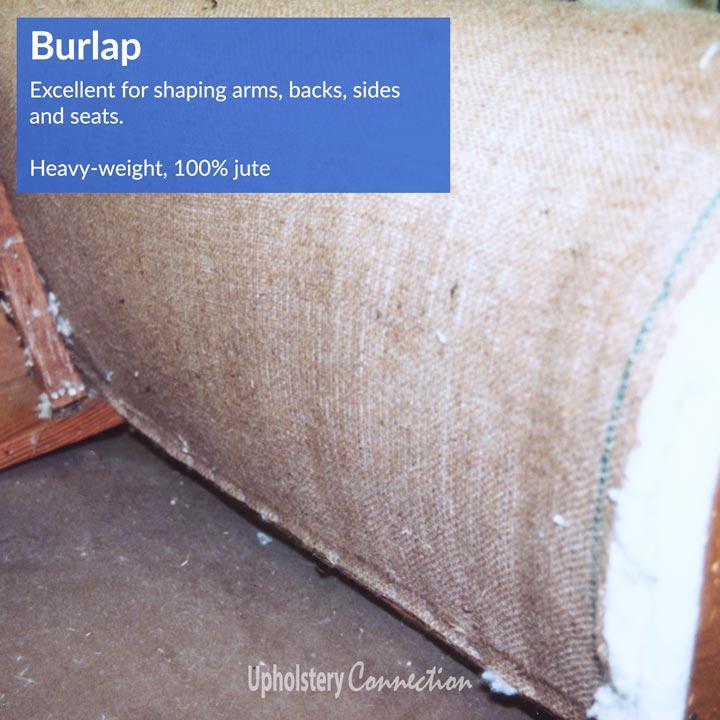
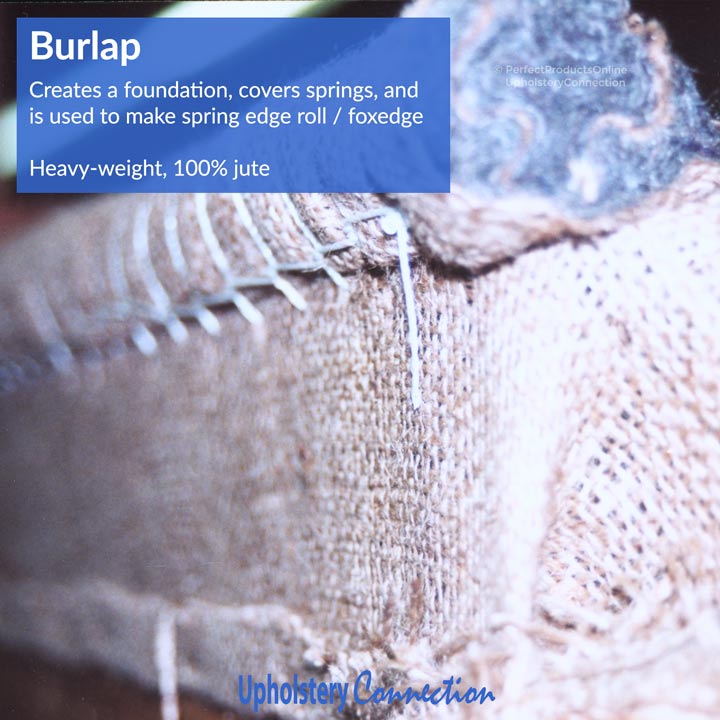
100% Jute Upholstery Burlap
$ 4.95
Our very high quality 100% jute burlap is exceptionally strong, heavy and made specifically for upholstery. Be sure to use upholstery-weight burlap for your projects. Burlap purchased from sewing and...

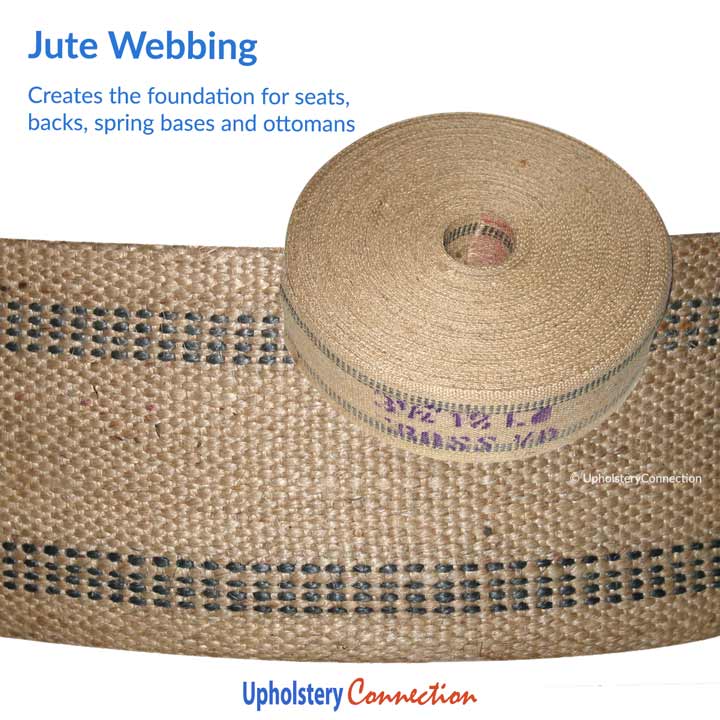
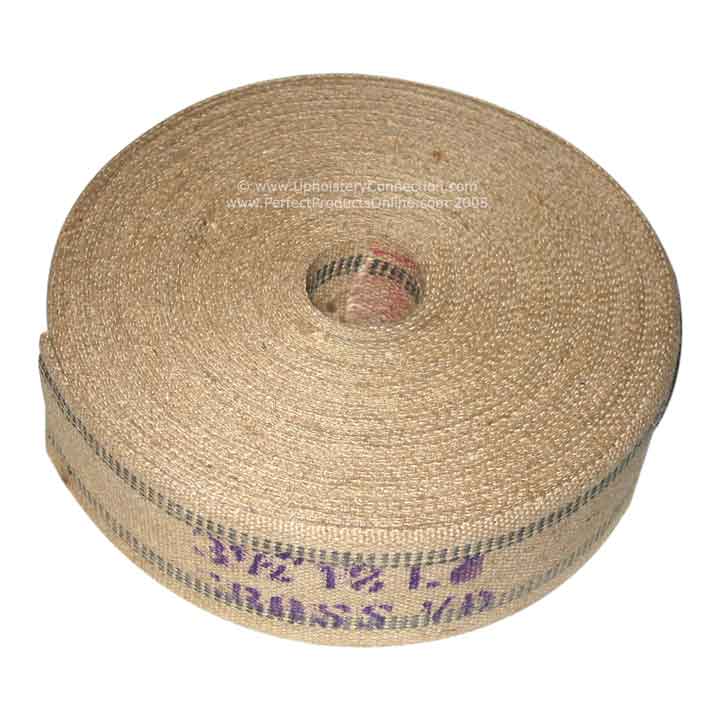
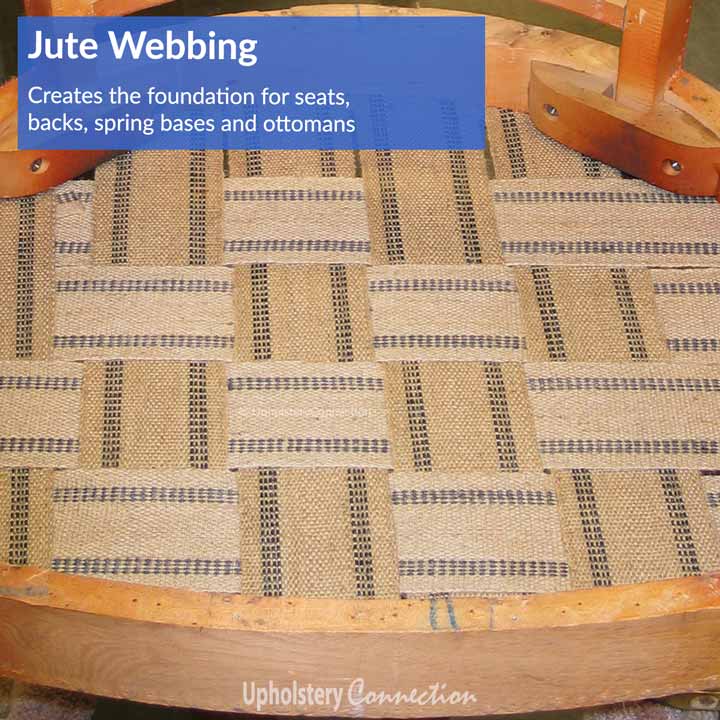
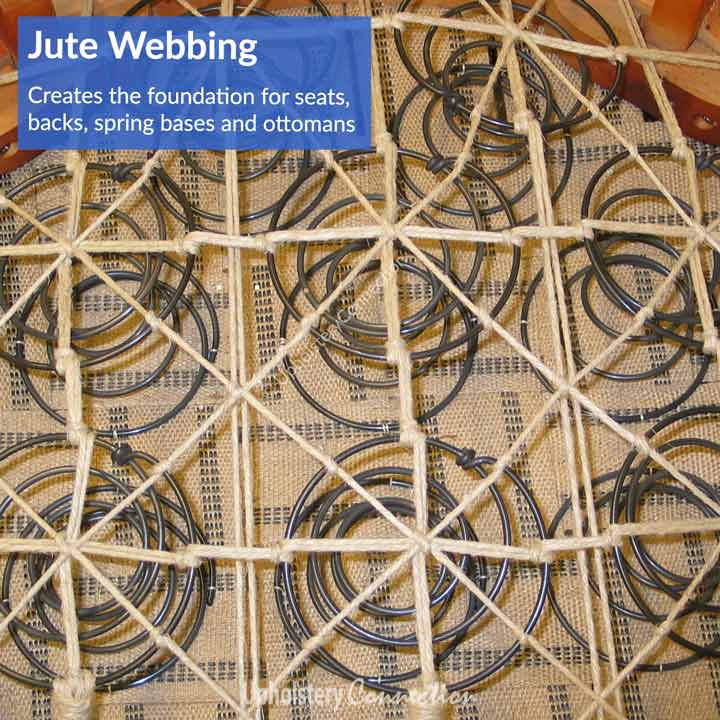
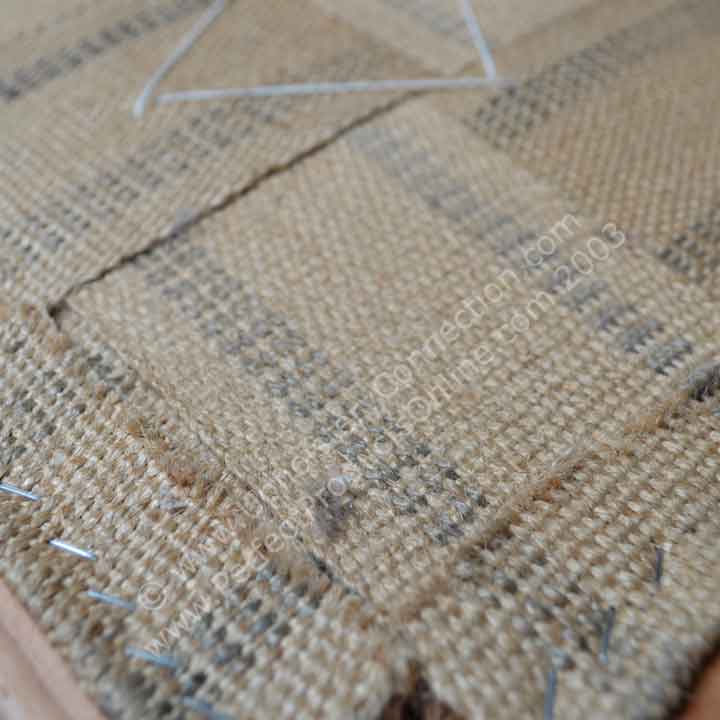
100% Jute webbing - Black Stripe
$ 4.95
Unfortunately, prices have gone through the roof, and we had to raise them substantially. 😢 Our black stripe jute webbing is a super strong, high quality webbing that creates a...


BB30BA - 3/4" Round Button or Prong
$ 78.95
BB30BA3/4" Brushed Antique Round Button or ProngStarlight Collection Quantity: Gross (144) Finish (images are color representations only): Brass / Gold Head Size / Diameter: 3/4" Available Backings: Select backing style...
© 2026 Upholstery Connection.